In this Tutorials I'am Declare How to Boot Kali Linux from USB Live Persistence Using Windows 10 and New Dual Boot Methods 2020 - 2021 without lost and data, fully loaded Pendrive you can use anytime and anywhere.
With the help of this method, your data will be safe, you can save your data in your Pen drive and can use it anywhere and in any device. This method is very easy if you follow my steps. There is no risk of your windows or Macbook getting corrupted by this method, you can follow this method without worrying.
Kali Linux is a Debian based Linux distribution (OS) Operating System. Kali Linux basically uses advanced Penetration Testing, Hacking and Security for any networks. Kali Linux is Developed by Funded and these tools Maintained by Offensive Security. This is a Leading information Security Training Company.
Kali Linux's first version name is BackTrack, This version released on 13th March 2013 and Kali Linux's current version is 2020.1, This version size is 2.0 G. Kali Linux has over 600 penetration testing tools included.
This is an open-source platform, you can also commit with this if you want, the whole source code is available. If you have more advanced knowledge about this, then you can rebuild the source code according to this and whatever errors you feel you can fix it.
You can download this operating system at kali.org/downloads and get it according to your system. If your system is 32bit, then you download it only, if your computer system is 64bit, then you download it only. This tool is absolutely free, you can download it easily and before downloading, you must check the value of SHA256Sum once.
I am using the Kali Linux 64bit 2020.1 version in these tutorials, you can also do the same version if you want.

Minitool partition wizard is a disk partitioning tool that is used to partition any Pendrive, Hard disk drive, solid-state drive, etc. With the help of this you can also fix a bad pendrive. This is a partition management program for HDD. MiniTool Partition Wizard is developed by MiniTool Solution on 24 July 2009. This tool is fully free but its paid version also comes, if you want, you can also use it.
Go to www.partitionwizard.com/free-partition-manager.html and download what do you want.
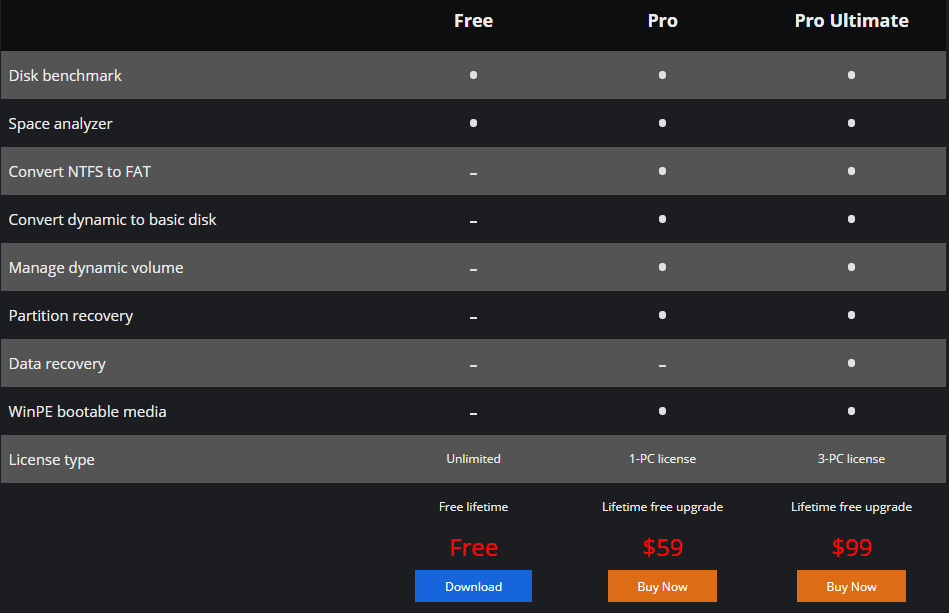
In these tutorials, we will use partition wizard to do the primary partitioning of Pendrive.
My First Question is How to Make Bootable Pendrive?
If you do not have a 16 GB Pendrive at work, then you will not be able to boot your Pendrive and even if you do, I do not say that but your Pendrive is working from 16 GB, then it will be much later If you use 32 GB or more than this, you will be able to lag, if you use it, if it is 16 GB then it will also run.
I am going to use 32 GB of Pendrive in this tutorial, if you want, you can also use it.
In these tutorials, we will learn how to make our Pendrive bootable using Universal USB Installer.
Universal USB Installer is basically used to boot Linux and Windows. It is a tool that makes Pendrive bootable. It is fully free. The size of this tool is about 1.7 MB. You can easily download Universal USB Installer was Released on 28th Oct 2016 Its first version was 1.9.6.8 and currently, its current version is 1.9.9.0 which was released on 12th Apr 2019 It has been developed by pendrivelinux.com This is an open-source platform
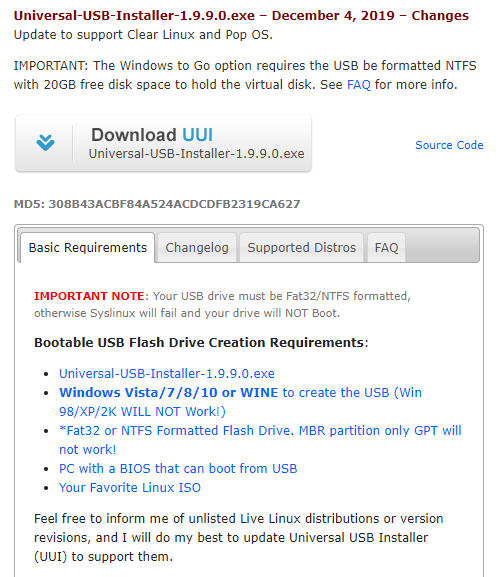
You can download here by going to www.pendrivelinux.com/universal-usb-installer-easy-as-1-2-3. In this tutorials, I am using Universal USB Installer 1.9.8.0
Note:- Ok, if you have understood all the steps above, then start the tutorial.
Insert your USB device on your pc.

Open your Universal USB Installer and click I Agree.
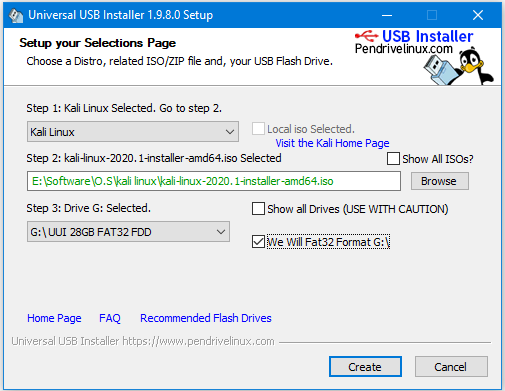
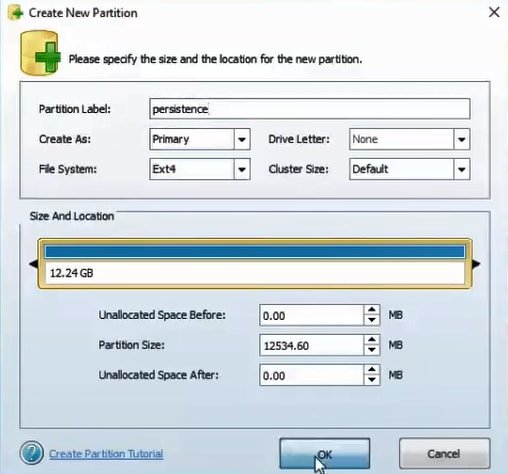
Now boot your system with USB and Select Boot Menu Live USB Persistence.

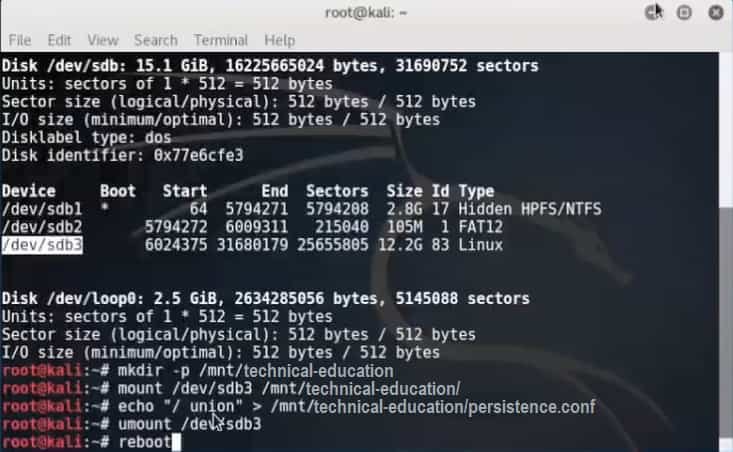
If you follow this same methods, you will never need dual boot windows 10 and Kali Linux.
Related Post